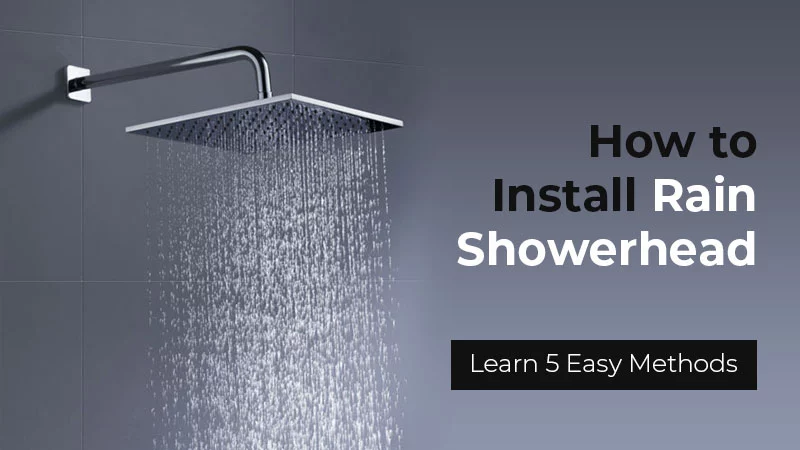
A rain shower head can help you take a really luxurious shower. It’s kind of like standing under a waterfall. Or out in the rain. Which is a premium shower experience that anyone would want. The only problem is that rain shower heads can be a little complicated to assemble. Because they don’t work quite the same way as regular shower heads.
Here’s How to Install Rain Shower:
Step 1 – Turn off water supply
The water supply can cause a huge mess if you don’t switch it off before the next step.
Step 2 – Disconnect shower head
Apply a little bit of pressure and turn the shower head to your left. This will loosen it up. After that just unscrew it all the way. Be careful not to damage the threads in the shower head. They help prevent leaks from occurring.
Step 3 – Install dual bracket
You are installing a dual handheld and rain shower head. So you need a bracket that can house both of them. You will have to remove the shower arm before you place the new bracket.
Step 4 – Attach both shower heads
The rain shower head will be connected where the previous shower arm was housed. But the handheld shower head should be screwed in next to it. The hose will come separate. Simply attach one end to the shower head and the other end to the valve.
Step 5 – Check for leaks
Sometimes when you change shower heads you can find leaks. Check the shower heads to make sure this isn’t the case.
Find out How Install a Rain Shower Head in the Ceiling
Step 1 – Remove Drop Ear Elbow
When you take out your old shower head and shower arm, you might notice a drop ear elbow inside. This is to help carry the weight of the shower arm. You need to position it elsewhere with a ceiling installed rain shower head. So right now you should remove it.
Step 2 – Prepare PEX Pipe
Take a PEX pipe and secure it with a crimping ring. The pipe needs to go into the ceiling so drill a hole to place it through. Make sure that the hole is wide enough for the pipe.
Step 3 – Place and Secure PEX Pipe
Attach the pipe to the valve. Ensure that the pipe’s placement is suitable. It should end just above your head. So that the water can fall directly onto you.
Step 4 – Attach Shower Head
Replace the drop ear elbow at the extending PEX pipe overhead. Attach a pipe nipple to it. Then place some tape around the threads of your rain shower head. Now all you have to do is screw it on. That’s just how easy it is to install a ceiling rain shower head!
How to Install Shower Head with Hose
Step 1 – Unscrew Old Shower Head
You need to take off your old shower head before you can proceed. Just unscrew it by turning it in a counterclockwise direction. This can usually be done by hand. But if the shower head is too tight just use a wrench instead. It will make the removal process much simpler.
Step 2 – Secure Base of Shower Head With Hose
Secure the threads on your shower head with tape before you attach it. Attach the base to the shower arm. Then just place your shower head on it. Screw the hose onto one end of the shower head. Attach the other end of the hose to the valve. You can now use the shower head effectively.
Step 3 – Install Wall Bracket
Some shower heads of this type come with wall brackets. You can slide them into the shower head base with ease. They make showering with this shower head type really convenient. Because you can place the shower head in the bracket when you don’t need to move it around. Using this shower head is great for people that want the hot water to reach specific parts of their body.
Where should a Rain Shower Head be placed?
You have two choices here. Either place the rain shower head on your wall or on the ceiling. But placing it on the ceiling makes a bit more sense. Because when it rains in nature, the rain falls from directly above you!
So installing your showerhead on the ceiling will get you the desired effect. That said, in some cases wall installation would make more sense. For example if your ceiling cannot handle the weight of a rain shower head. Or if the water supply can’t reach that area.
How much does it cost to Install a Rain Shower Head?
Some people opt for a DIY approach with shower head installation. If you do this, it will cost almost nothing to install a rain shower head. You would just need to pay for some tools that can come in handy.
But if you don’t have the skills required to install a shower head yourself, you might need to hire a plumber. In that case you would need to spend around $100 to get it installed. Some plumbers might charge up to $150. It depends on how complicated the installation process is. As well as what kind of shower head you want to install.
How far from the wall should a Rain Shower Head be?
It is important to install a rain shower head the appropriate distance from your wall. Otherwise the water pressure could be compromised. If you have a detachable shower head, remove it and aim it above your head. Then turn it in a full circle to see where the water reaches.
Based on this you can determine the ideal distance from the wall for your rain shower head. Be careful not to install it too far from the wall. Because this could compromise its structural integrity. As well as place excess strain on the shower arm.
Do Rain Shower Heads use more water?
People commonly assume that rain shower heads use more water. But this is just a misconception. You might think this way because of the intense pressure that comes out of this type of shower head. As well as how visually aggressive the water stream appears to be.
In spite of this, rain shower heads actually use less water than normal shower heads. While you would use more liters per minute, you would need to shower for a shorter period of time. Because your body will get rinsed very quickly with this shower head type.
Should Shower Head be Centered?
Most individuals would prefer to have a centered shower head. It can be seen as an aesthetic preference. Because an off center shower head can look a little strange. But there are practical benefits to it as well. Such as helping you direct the flow of water to your body.
This is more effective than if the water is just hitting your head or face. Because you can always lower your head to wash it while you are taking a shower. You might want a shower head that is off center. But this would be a very unusual choice with no real benefits.
Can you Install a Shower Head yourself?
Depending on your level of skill, you can try to install a shower head on your own. This is an example of a plumbing process that can be done by a layman. All it requires is just unscrewing a shower head and then screwing a new one back on.
There are a couple of technicalities that you should pay attention to. Such as wrapping the threads in tape to prevent leaks. As well as covering the shower arm with a rag if you need to use a tool. But as long as you use common sense, it should be easy.
What is the best Size Rain Shower Head?
The size of your rain shower head can impact water flow. You need a size large enough to give you a good rain-like shower effect. 12 inches seems to be the most popular size. And for good reason. A 12 inch sized rain shower head is perfect for most people at home. If this seems to big, you can buy 6 inch wide shower heads too.
What is the Point of a Rain Shower Head?
With a rain shower head, you can get a full body shower done in no time. You also get great water pressure which can massage your muscles. Rain shower heads aid in water conservation. Which makes them useful for water scarce areas.
They’re also just a lot of fun to use. And since you’re not using excessive water, you can enjoy these showers without having to feel guilty. There are plenty of functional and aesthetic benefits to using a rain shower head. Which is why this shower head type is enjoying so much popularity these days. Just make sure that you install the shower head correctly.